Saturday, May 5, 2012

Coffee Table

Great Project!  When I got it at a yard sale it was a little banged up!  It had milked spilled on it, lots of marks on the top from toys and blocks, one wheel missing and a drawer out of whack.  I could tell it was a diamond in the rough! 
Here's a before pic.  I let it sit im my basement awhile, contemplating what to do.....
I fianally decided, with the help of my husband, to sand the top and paint the rest. 
We really liked the way our buffett had turned out with two different colors of paint, so we decided to go that route again.  We knew we were going to have to sand the top all the way down to get to a nice even surface.  So, in the deal I got a new belt sander! Yay!
Here is a pic from the side.  We wrapped the color all the way around.  It really turned out nice.  My husband fixed the wheel and waxed all the drawers and lined everything up and tightened all the rails the drawers glide on.  We put about 3 coats of polycrylic on top and one coat on everything else. 


Saturday, April 14, 2012

Vanity Stool

Vanity Stool

Really nice re-do!  this vanity stool was in pretty good shape.  I don't have a before picture:(
Let's just say the wood was in pretty good shape.  The fabric was rotten and ugly!  I found this really nice fabric at Hobby Lobby.  It was a little expensive, but it only took about half a yard.  I bought some new foam, and cut it to fit.  Used a staple gun to secure everything.  I did sand the rough edges.  The prevoius owners covered alot of their furniture in some really thick awful sealer of stain of some kind.  It was almost like sanding paint.  Once I got it smooth I decided to distress the edges a little and restain the whole thing.  Used polycrylic to seal it all after it dried.  Lovely!

Saturday, April 7, 2012

Bedroom Suite

I know I say all my projects are my favorite, but this one really has been one of best ever!
This furniture really did seem like a lost cause!  I was in a really old abandoned house.  The bed was actually in an old store.  
This is how I found it!
pretty rough!  I had to pull off alot of vaneer and do some sanding! 

The drawers were a little sticky on both the vanity and the chest, but the vaneer was in really good shape.  So we decided to clean it up and use some poly, and they turned out really nice!
so our color combination was born. 

Took lots of time! but worth the effort! <3


Thursday, March 29, 2012

Garden Chairs...

Fun Garden Chairs!


I found two old chairs that had been stored in an empty building for more that 20 years.  They were in pretty bad shape.  I removed all the webbing and painted and distressed!
I used some stencils and scrapbook paper for the lettering.  The baskets complete eith chains came from wal-mart.  They were easy to attach and hang where the seats were! Add some nice flowers and your done!


Sunday, March 18, 2012

Pretty Picture Frames

Pretty Picture Frames
I have seen these all over Pinterest! Loved them, but had a little trouble finding the frames.  I think they have become so popular, everyone is grabbing them up! 


The before pics kind of tell the story.... Very old, very dirty.


No, you are not seeing double!  I have two!  I cleaned thep up with TSP, and put on a coat of my favorite color paint!

I used a brush an put the glaze on one side at a time.  Pretty thick so I could get in the cracks. 
Take a soft cloth an wipe off the excess. 


When your finished, and its all dry, either use some polycrylic or some sort of spray sealer.
Really easy and looks great! Good Luck finding your frames!

Tuesday, March 13, 2012

The box!

I call it the box!

Still at the thrift store. 
It was a solid box.  The hardware was really heavy, and in good shape!  I sent a picture message to my husband, he was a little bit skeptical....
I deglossed!
I prinmed!
I sanded and added stain to the bare places I sanded. 

I love the finished project!


Sunday, February 12, 2012

Drop Cloth Curtains


My newest project!  I really like how they turned out!

I started with a really big empty window.  My ceilings are really high so I needed my drapes to be a least 96 inches long.  I don't know how many of you have priced curtains that have that kind of length, but this was looking like a really expensive undertaking!

The window is a big 93 inches wide and I wanted them to hang all the way to the floor.  I really hated the lines in the three separate blinds!  Sooo I did what I always do and started looking on Pinterest for ideas.  I found several different "drop cloth curtains"  Well if it's one thing we have around here, its drop cloths.  I tried to imagine what they would look like.  Certainly they would be big and cheap.  I got mine at Home Depot on the advise that they have the "best".  I read to be careful and make sure you get them all the same color.  I also heard horror stories about the one's at Lowes having seams right down the middle.  I was lucky and mine were all perfect!  They are already hemmed on top and bottom, so no sewing! Yay! 

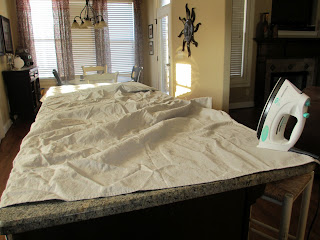
These are the ones I got!  $10.00 bucks each!  Can't beat that!  I washed them all to get the drop cloth smell.  Surprisingly the take on a much softer feel after thay have been washed.  They did wrinkle though.  Luckily though I have a six foot marble bar that worked great for ironing them. (Also, thankfully a husband that does not mind ironing!)

After all that ironing we were trying to figure out how far apart to put the clip rings I bought.  I got 5 packages.  I was thinking one for each panel, and 1 in case I had no idea? 

I put one clip on each end and the one right in the center.  It kind of worked out about one per 8 inches.  I was one clip short! dang!  So I just sort of stretched one panel a little further. I all worked out ok..
See how nice and smooth they ironed out!  Next my husband installed my really long curtain rod.  We decided to just let the extra length pool at the bottom.  I saw some that were turned over at the top, but I didnt like that look too much. You could do it either way. 

Next I am going to hang these on my back deck!